Share a Feed of Links Microsoft Teams
Upload and share a video to Microsoft Stream with Teams Site permissions
Watch this video to learn how to upload a video file from your device to Microsoft Stream. Then set viewing permissions so that only members of a Teams site can watch your videos. See also step-by-step instructions below.
Note: This video is restricted to Marquette University users. If you are not already logged into Marquette's Office 365 portal, you will need to sign in to view this video.
Uploading a video to Microsoft Stream
Important: Read First
To continue with these instructions, you need a Teams site to assign viewing permissions and limit access to your video. If you don't have a Teams site, find out how to create a Teams site.
Instructors: Creating your own Microsoft Teams site means you will manually change the membership for students. Note that IT Services creates Teams sites for each course section, and students are automatically added and removed as enrollments change.
- Go to office.com. If you haven't recently logged in to Office 365, you may be prompted to sign in.
Click or tap here for instructions to log into Office 365...
- Type in your marquette.edu email address, or select your email address if shown as an option. Click or tap the Next button.
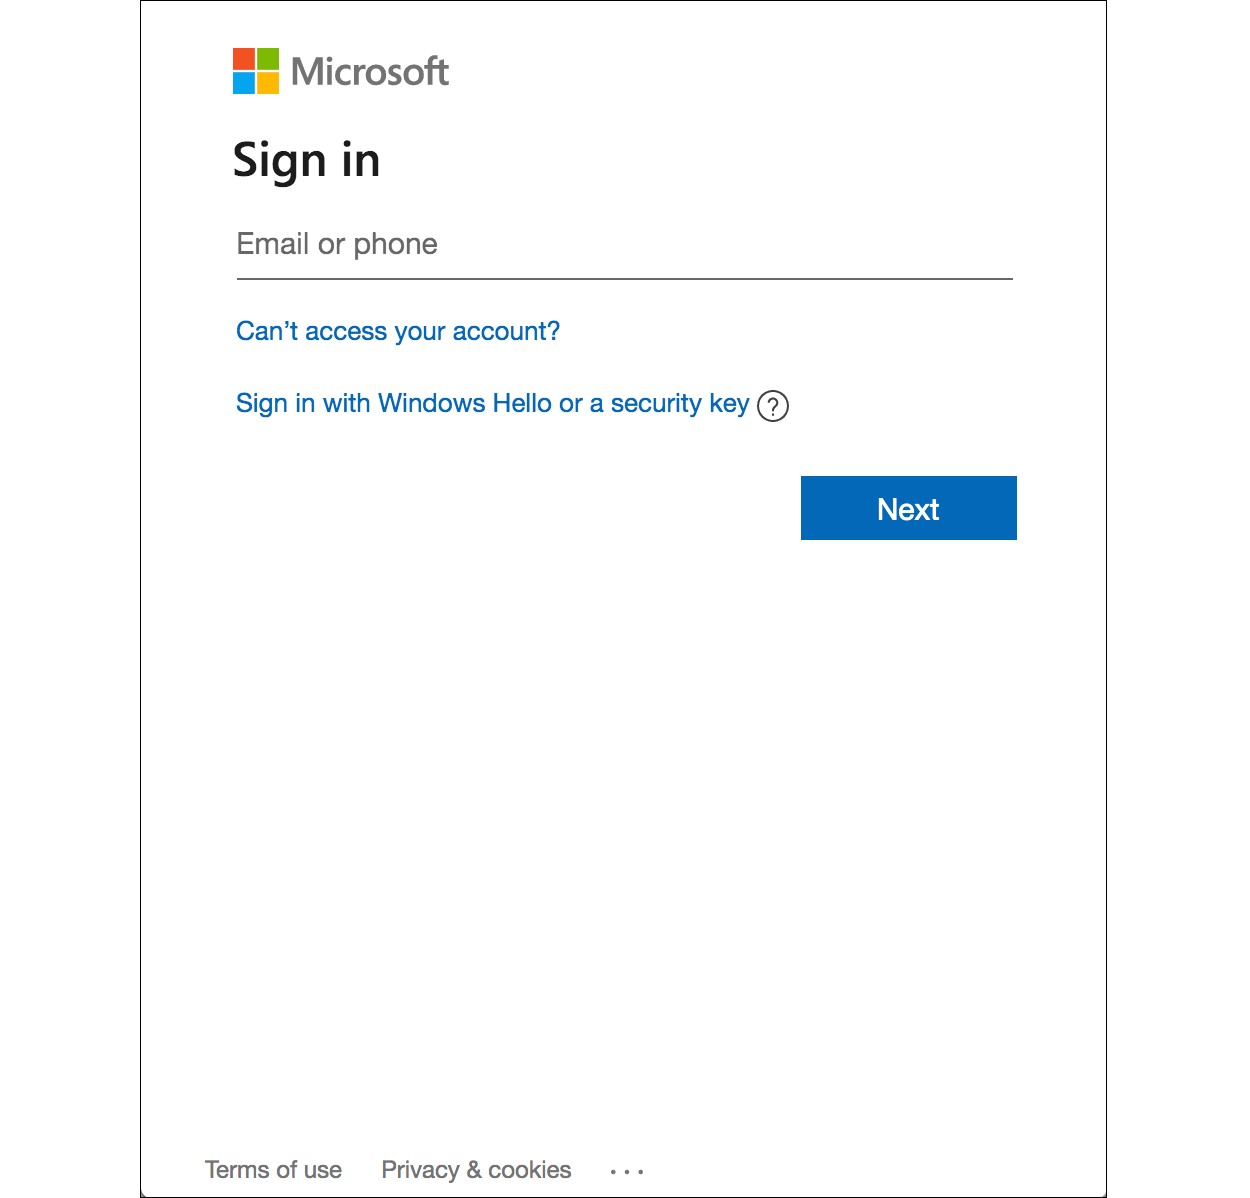
- You may be prompted for your password. Enter your Marquette password and click or tap the Sign in button.

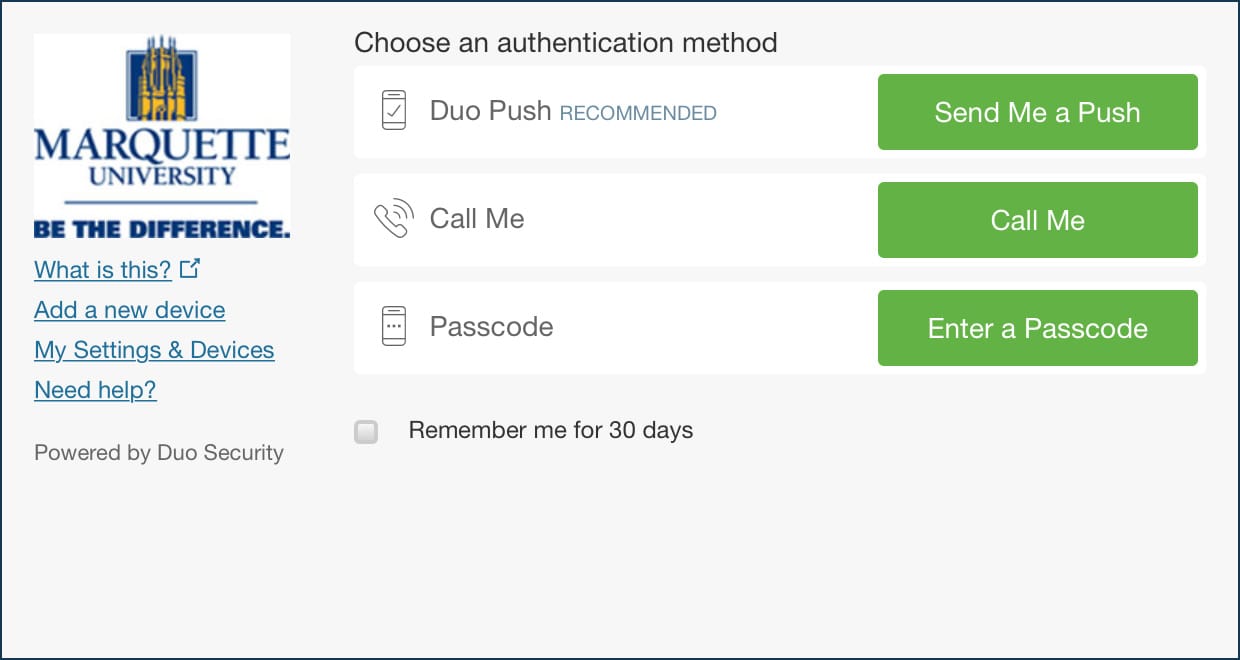
- Faculty and staff accessing from off-campus may need to verify their identity further with a Duo Security prompt. Select and act upon your Duo method (Send Me a Push, Call Me or Enter a Passcode) to continue.
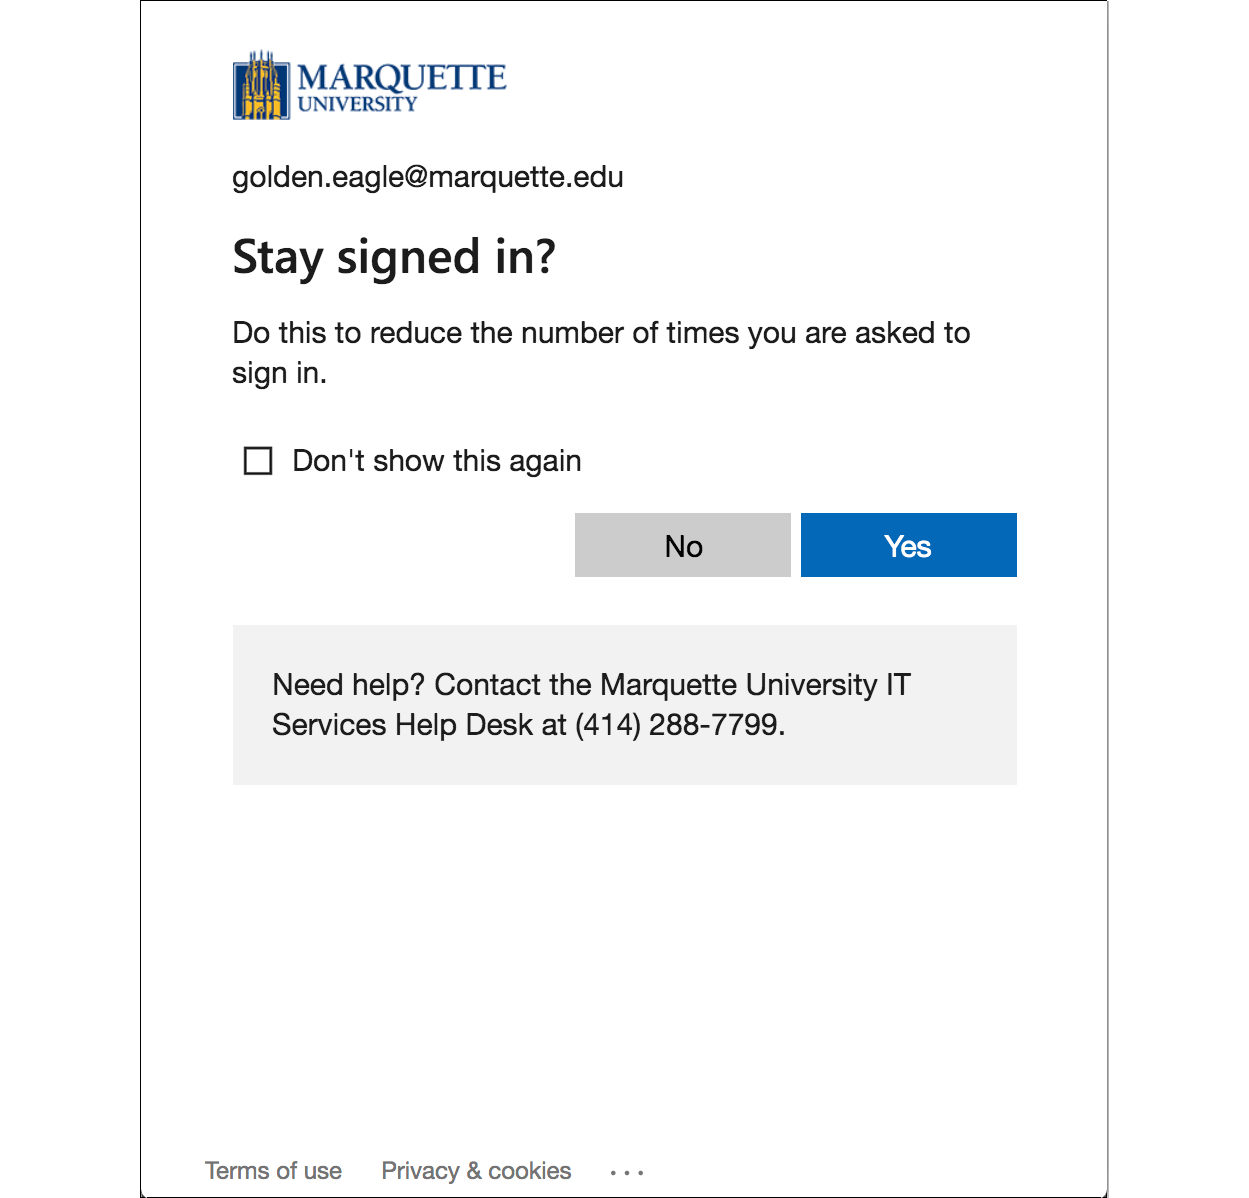
- Decide if you want to stay signed in to reduce your number of logins. Select Yes or No.
- Type in your marquette.edu email address, or select your email address if shown as an option. Click or tap the Next button.
- The Office 365 home appears. If you don't see the Microsoft Stream icon, click or tap the App Launcher icon
 in the upper left. A menu appears with a list of Apps. If you still don't see Stream listed, click or tap All Apps. Then select the Stream icon.
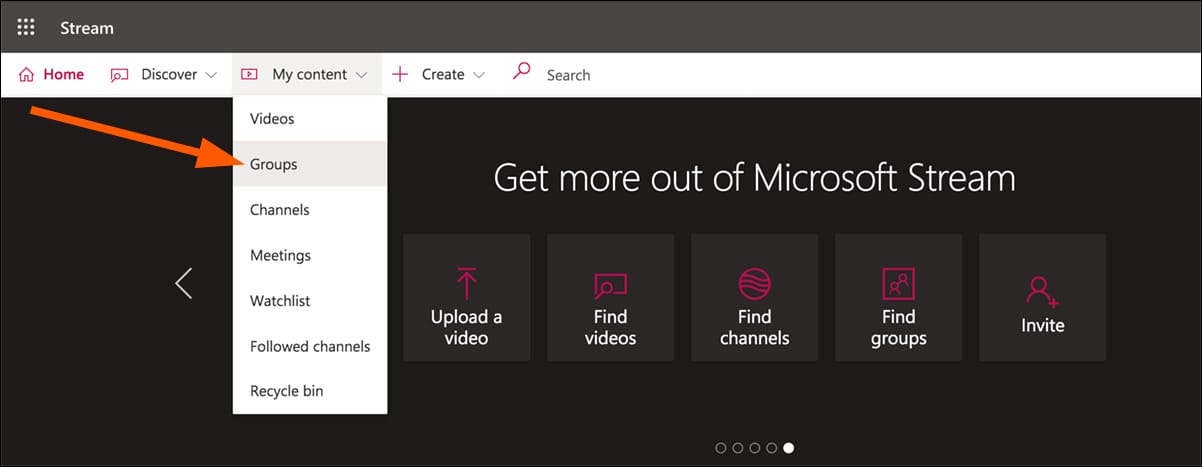
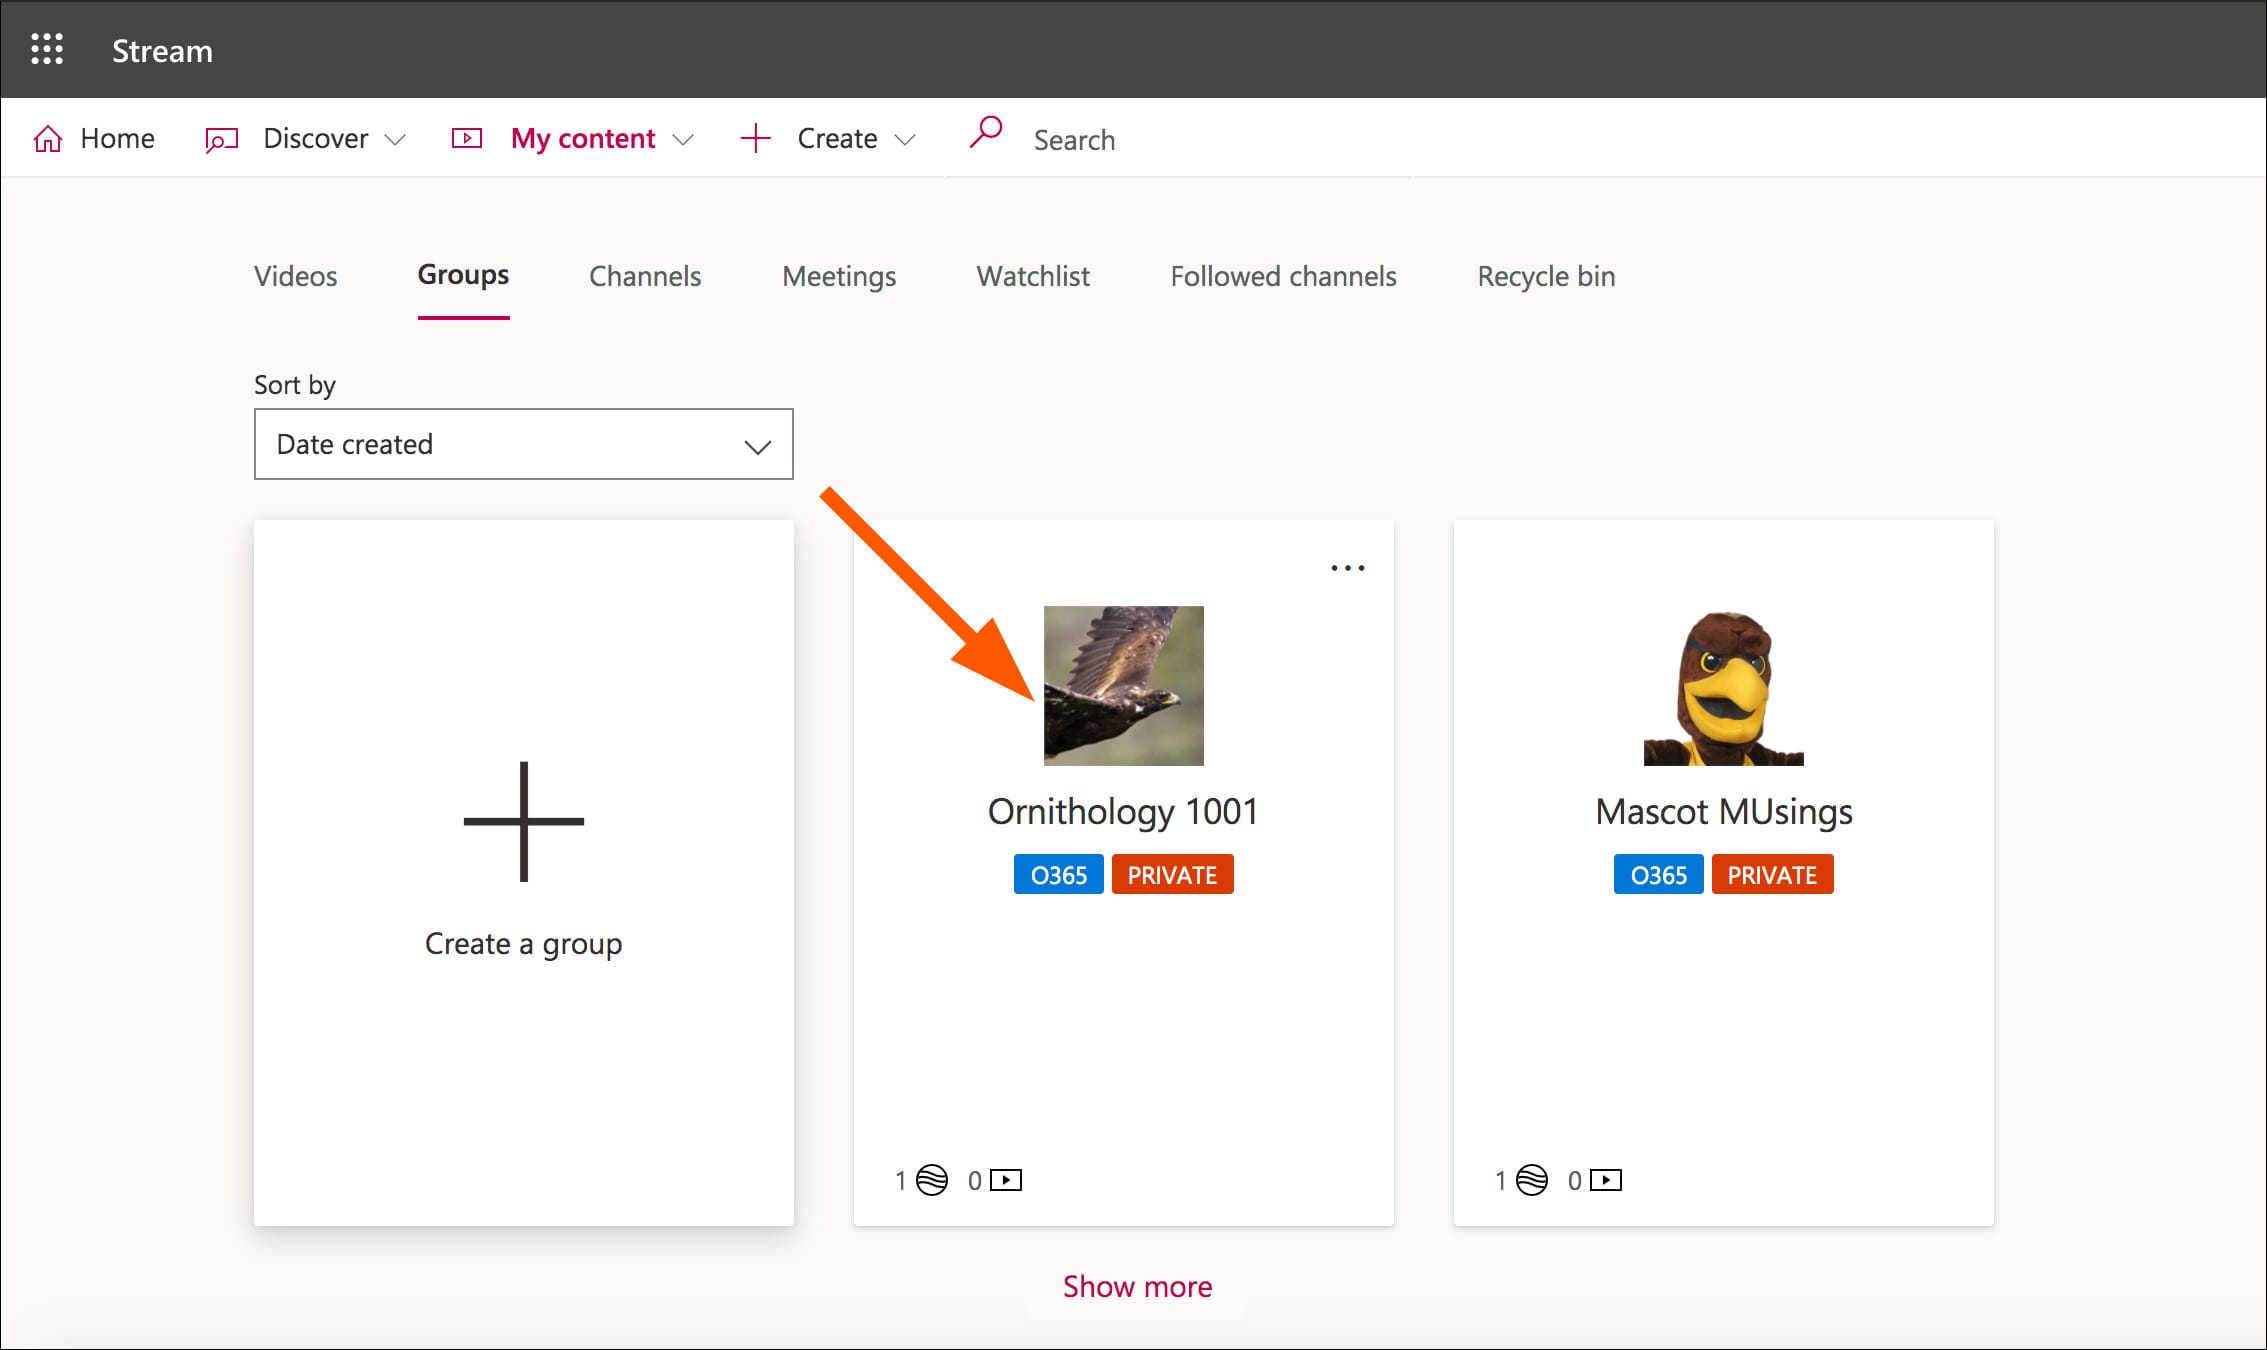
- The Microsoft Stream home page loads. Click or tap My Content > Groups.
- A list of Groups appears. Find the group with the same name as your Teams site. You may need to click or tap the "Show more" link to list more choices. If the Teams site was recently made, select the "Sort by" drop down menu on the left and select "Recently Created" to reveal the most recent options. Once you've found your Teams site, click or tap its tile.
- A Microsoft Stream page appears for your Teams site. Click or tap Upload video and select a video file from your device.
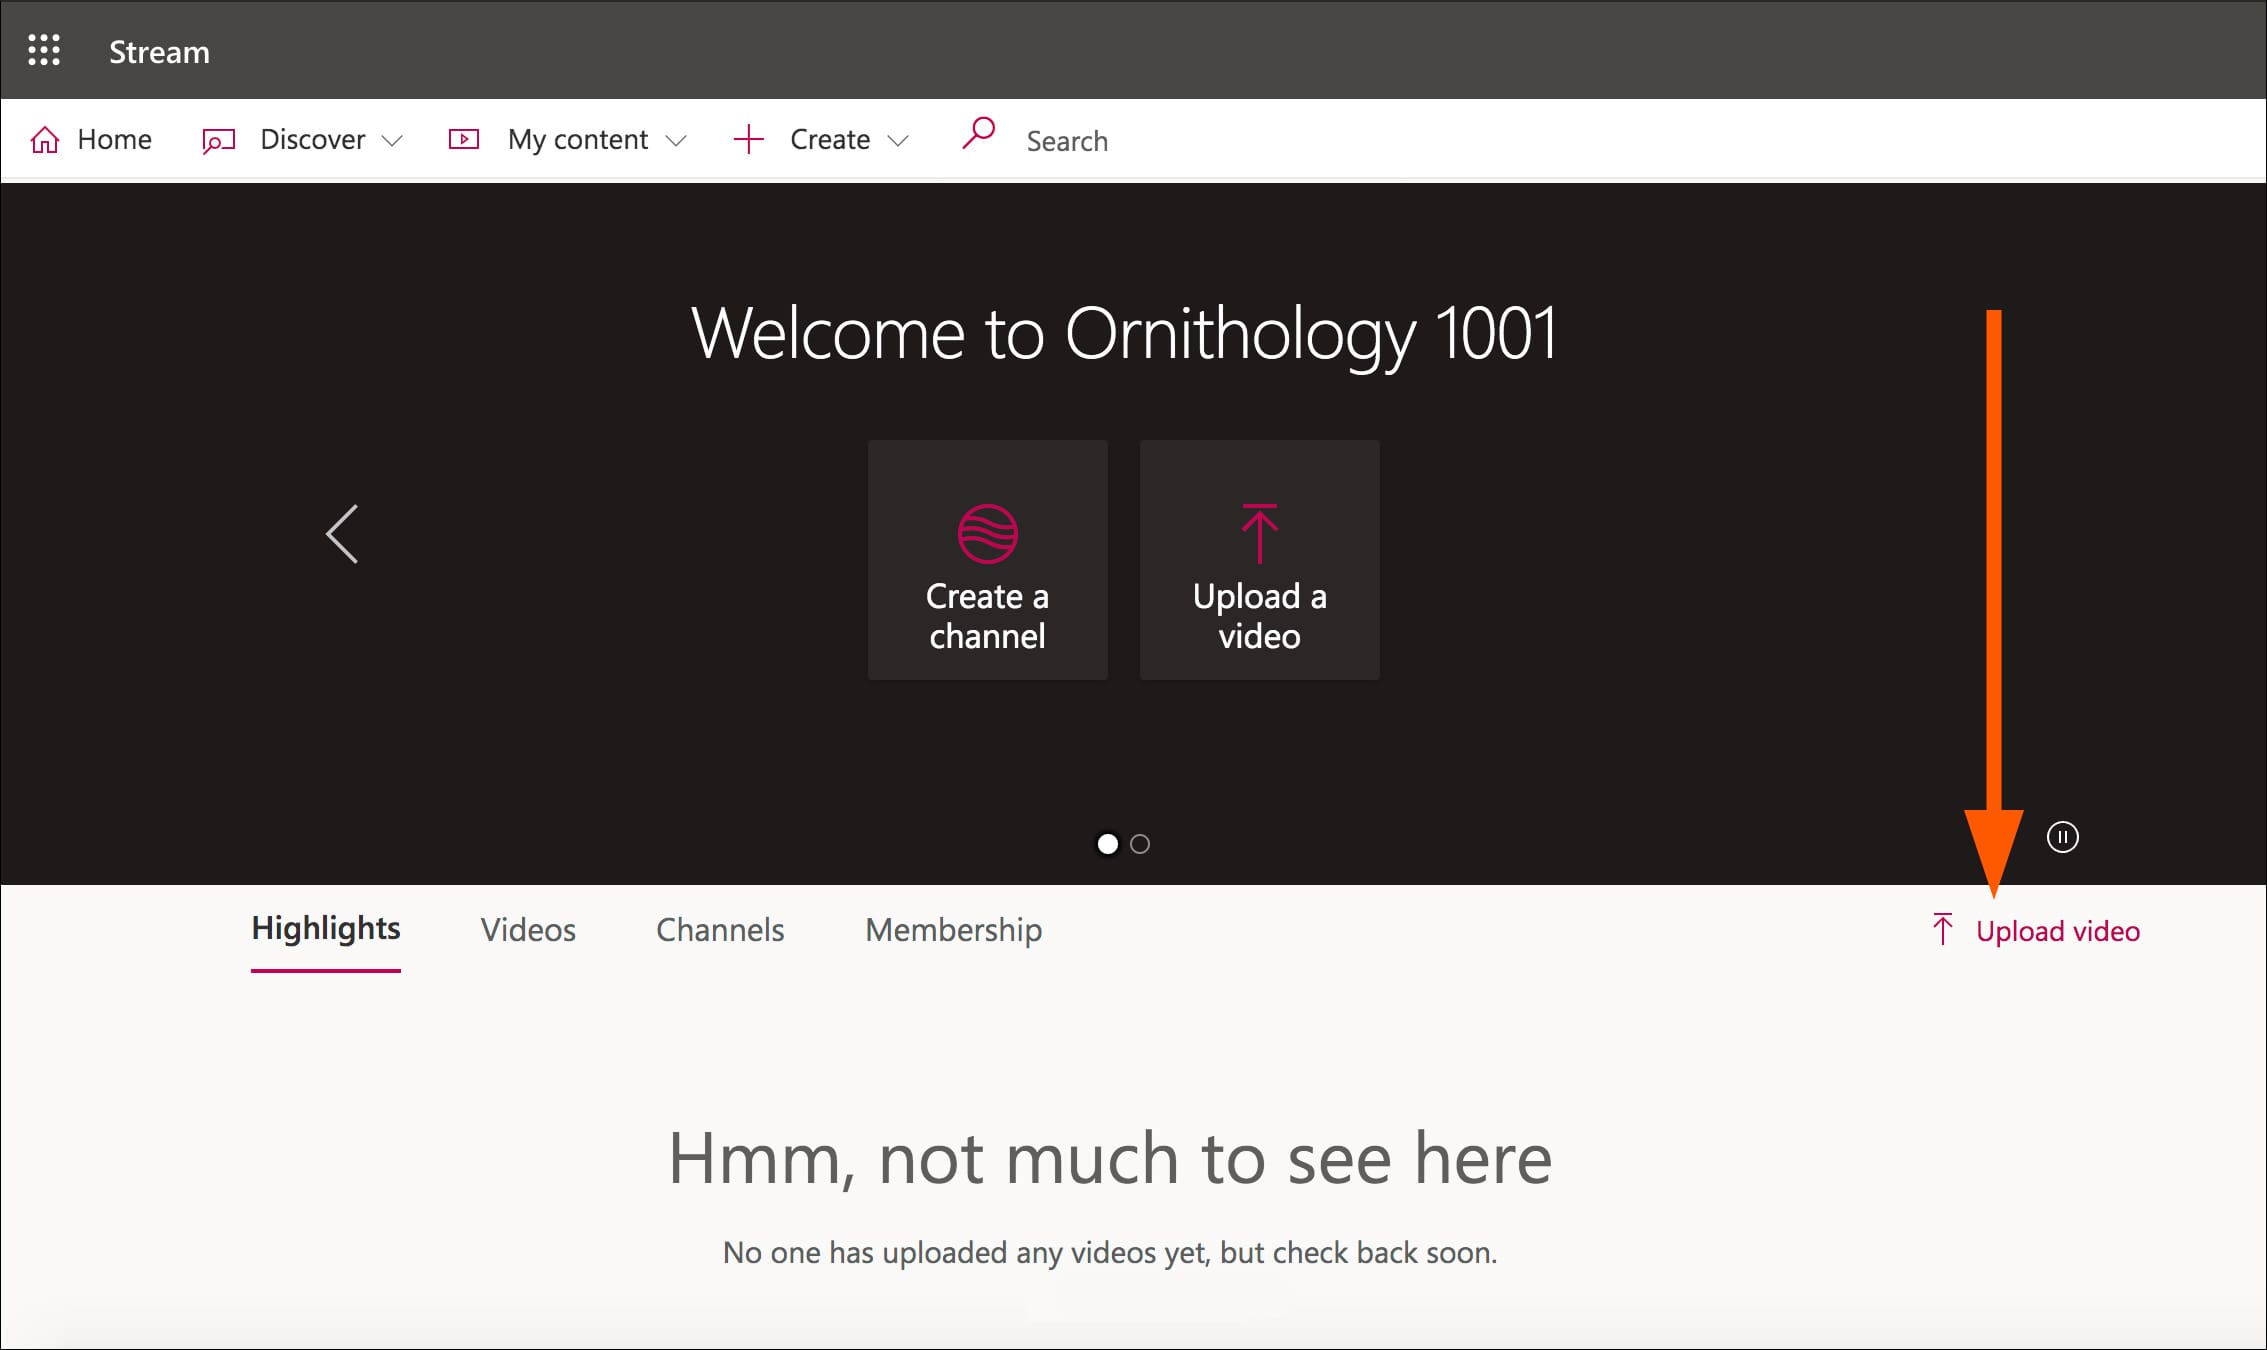
- If you are prompted for a default language, select a language from the drop-down menu (e.g. English) and click or tap Save.

Setting Video Permissions and Options
- Your video uploads. When uploaded, the publish button appears and processing begins. While the video processes, click or tap the Permissions section.
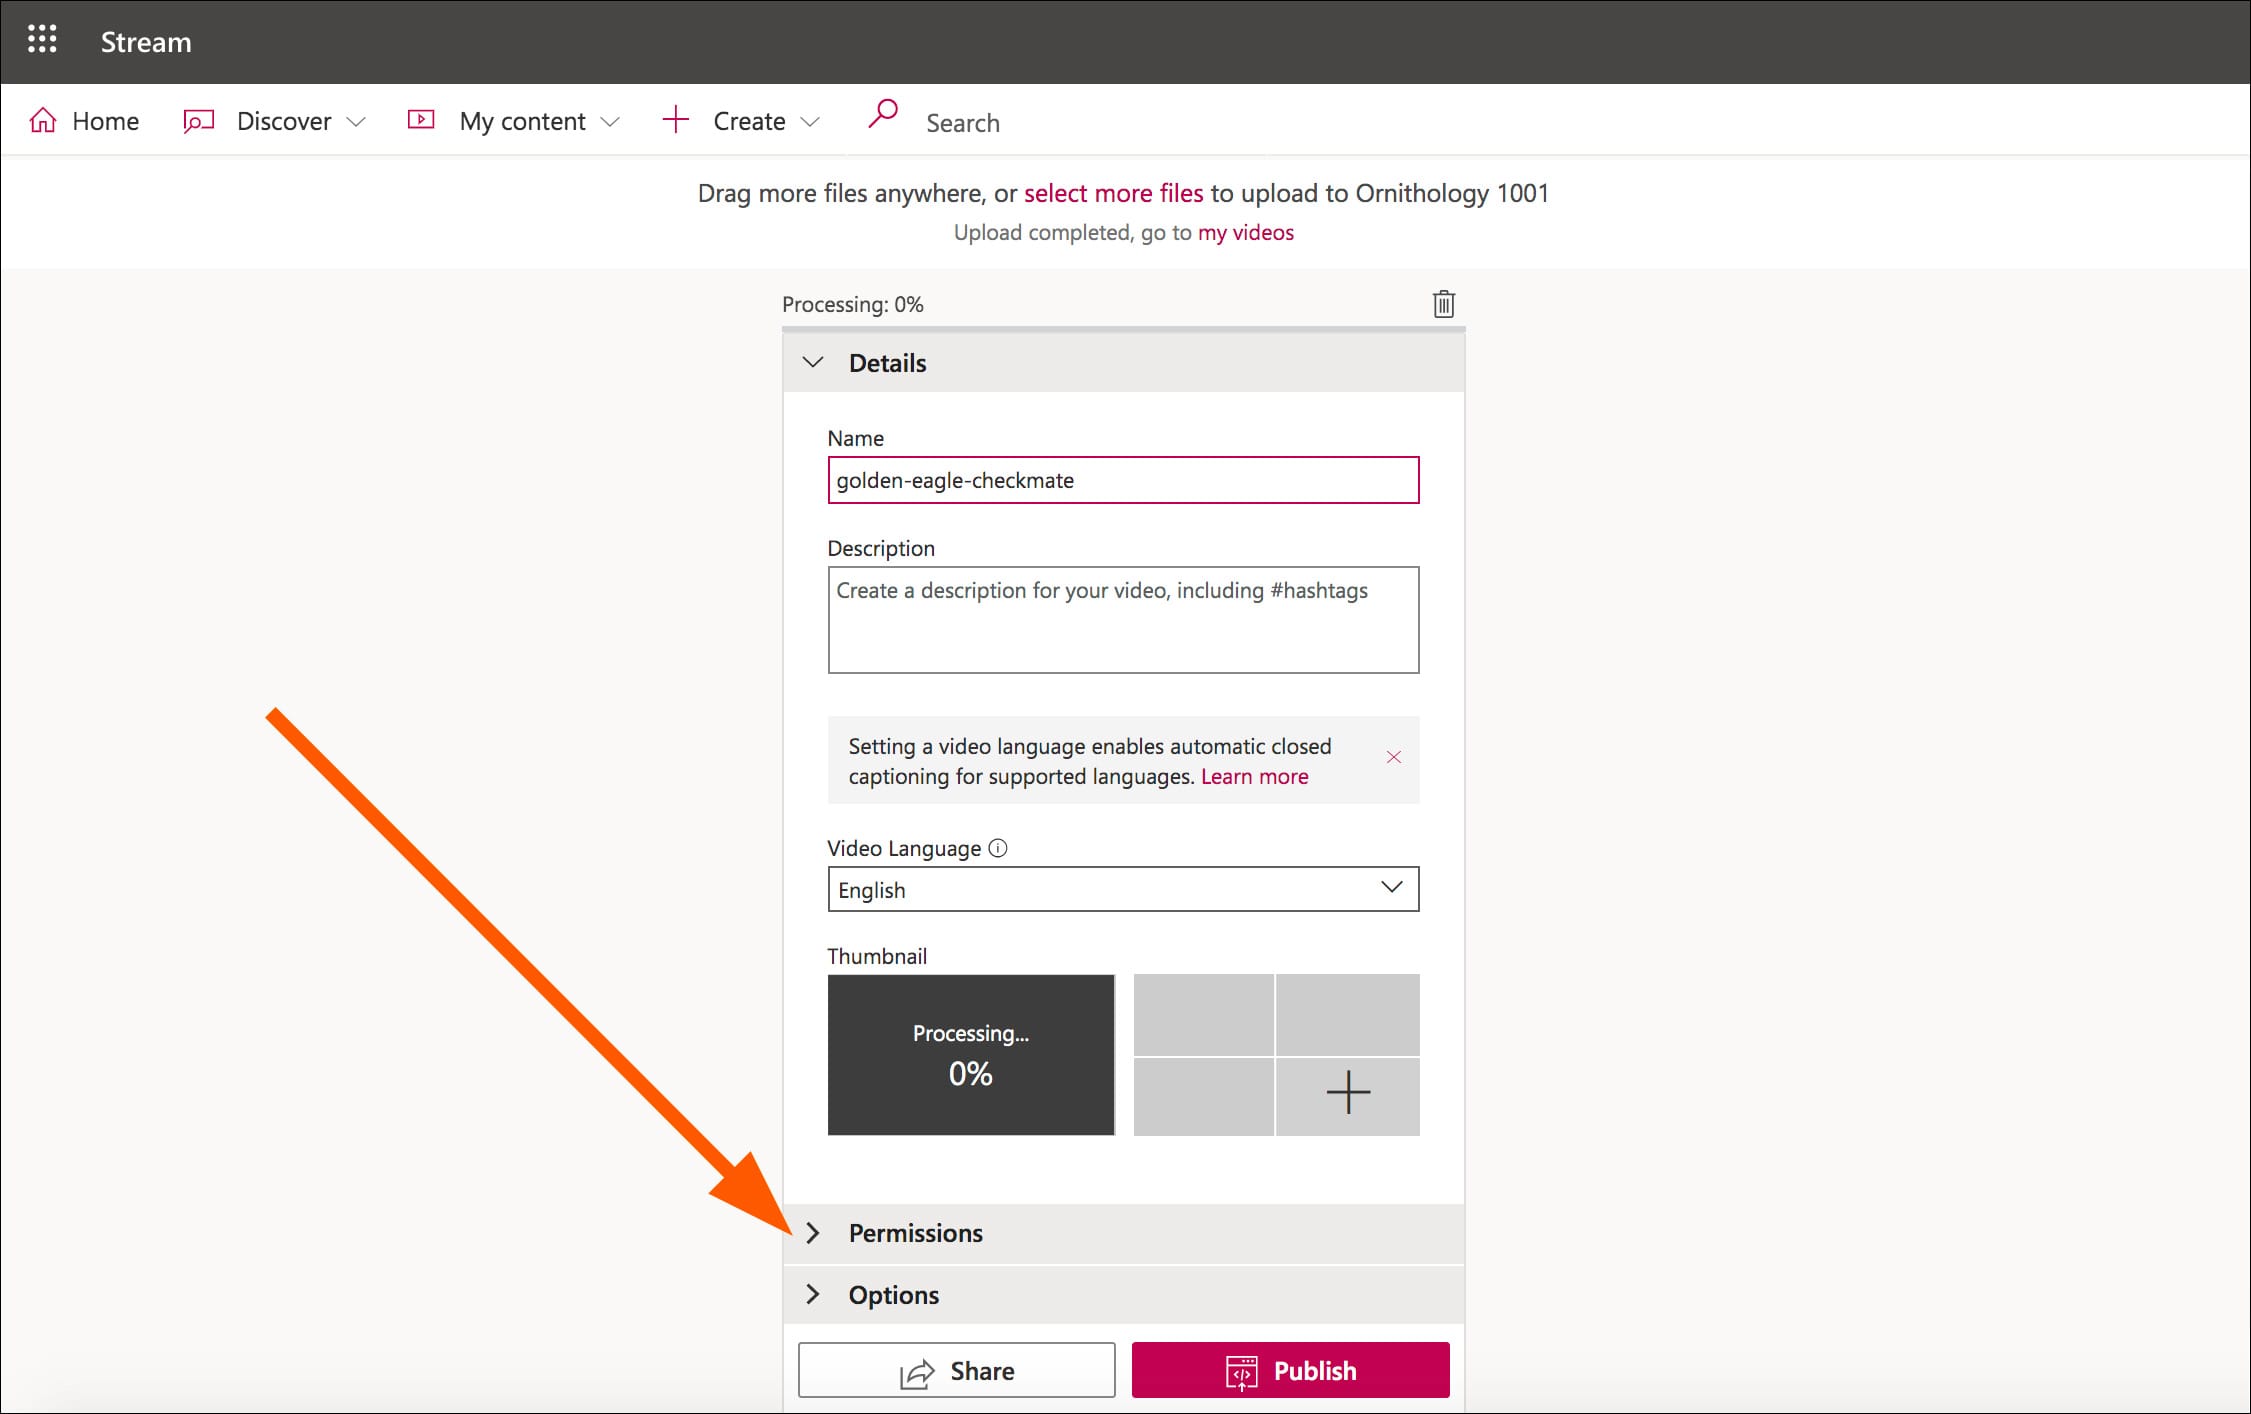
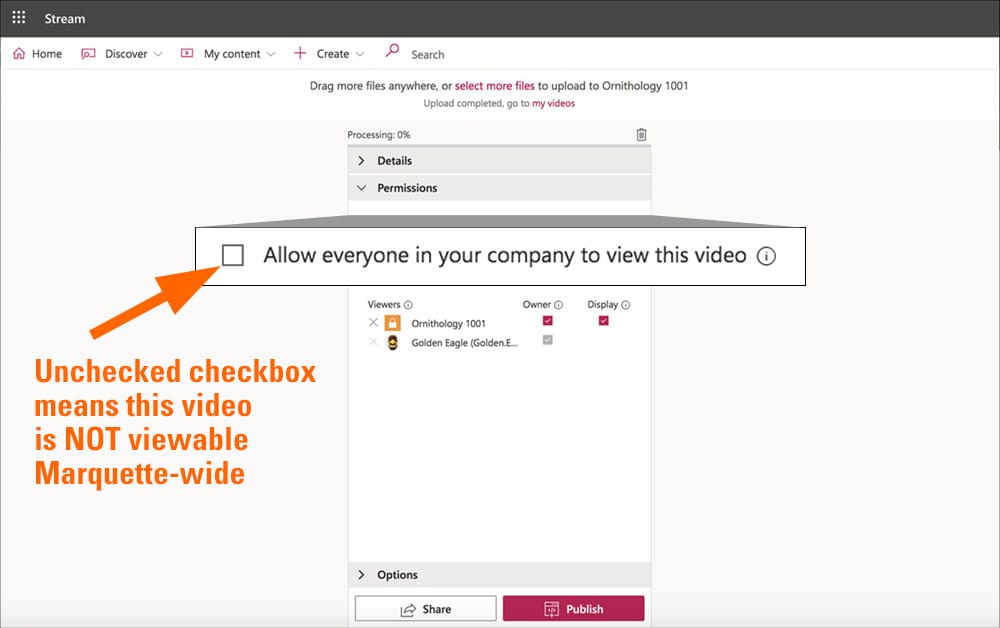
- The permissions for the video appear. Under the Viewers column, the Teams site is called Ornithology 1001.
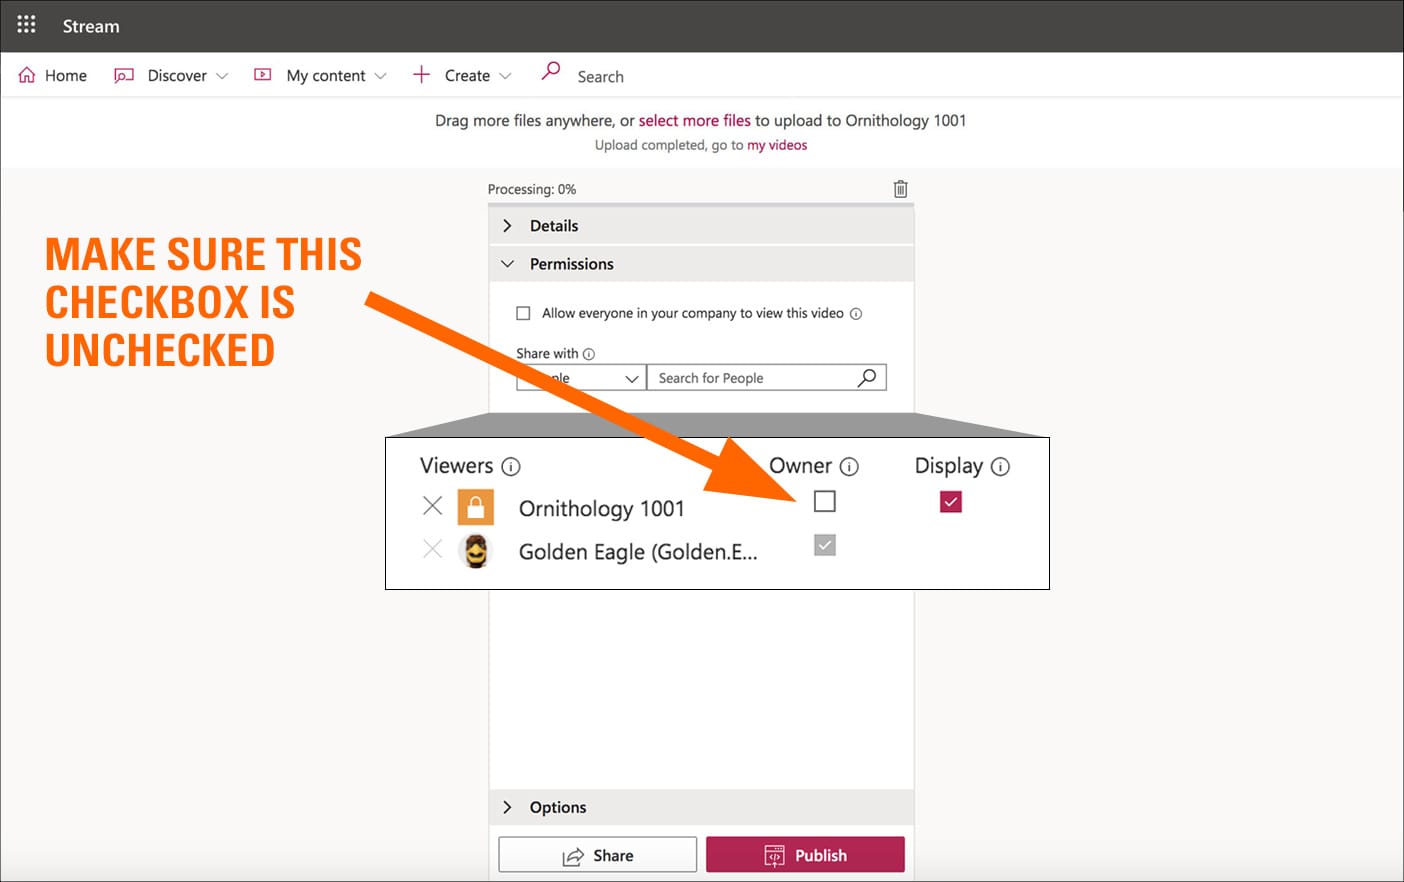
Note that "Allow everyone in your company to view this video" is unchecked (zoomed in below) which prevents Marquette-wide viewing access.
-
CRITICAL STEP FOR VIDEO PERMISSIONS
You must uncheck the Owner permission checkbox (zoomed in below) for the Teams site.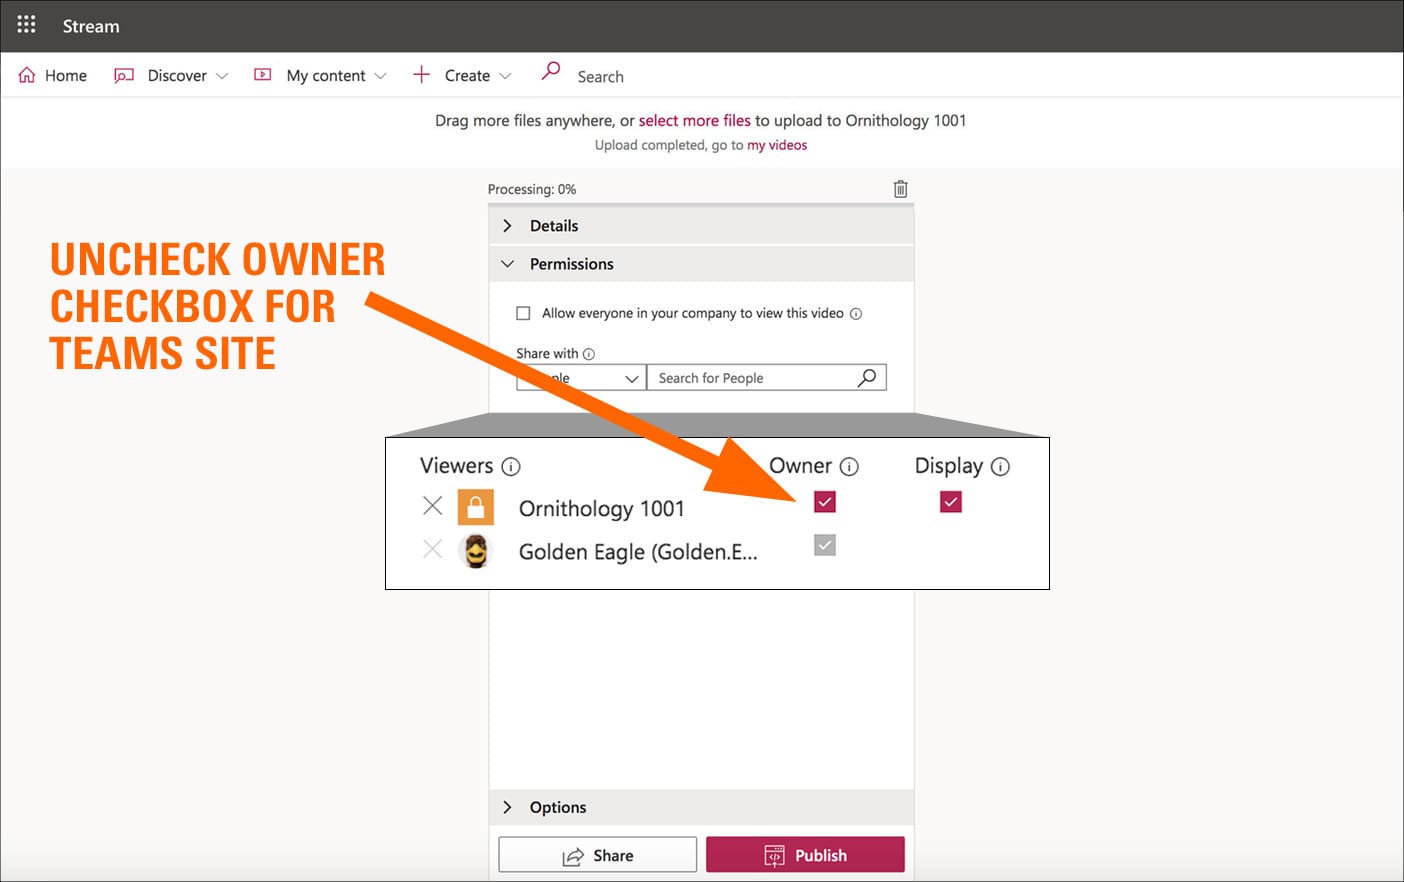
- Before proceeding, please make sure you unchecked the owner permission checkbox for the Teams site in Step 9. If that owner permission checkbox for the Teams site is left checked, then Teams members — such as students on a Teams course site — can modify or delete your video .
Note the image below (with permissions zoomed in) shows the Ornithology 1001 Teams site does not have owner permission.
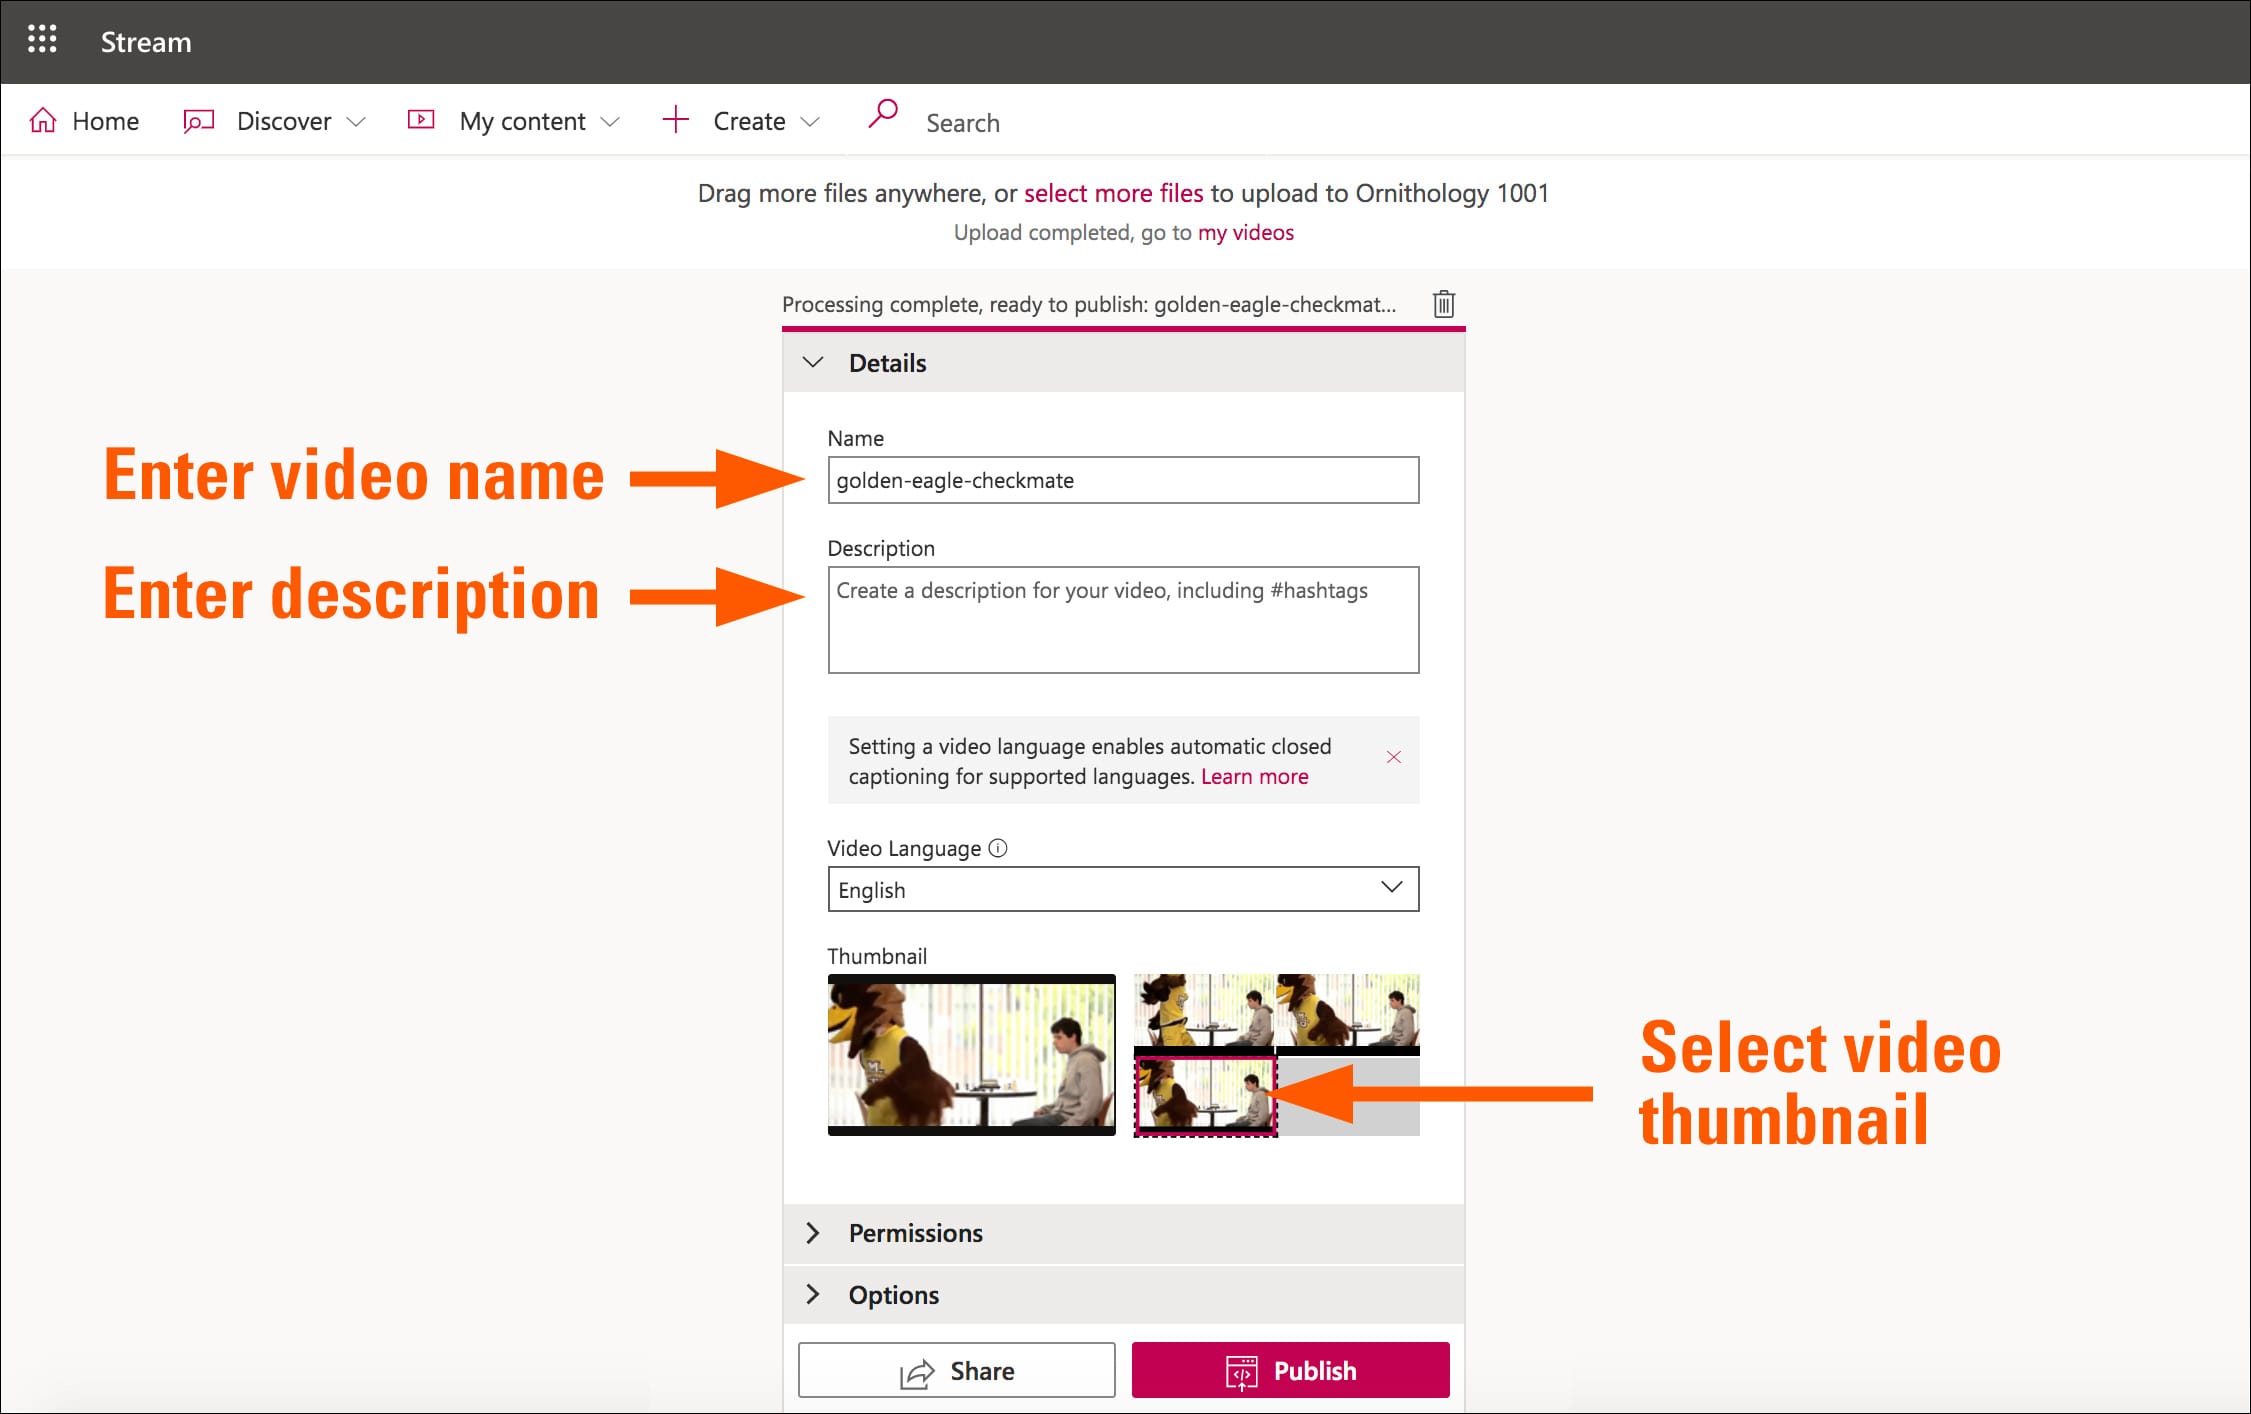
- Click or tap the Permissions section again to close the section. Under the Name field, you can rename the video. For description, give your video a brief summary. When the video finishes processing, you can select a thumbnail image that appears before the video is played. If your video is long and still processing, keep the browser window open while processing. Microsoft Stream will send you an email message when processing is complete.
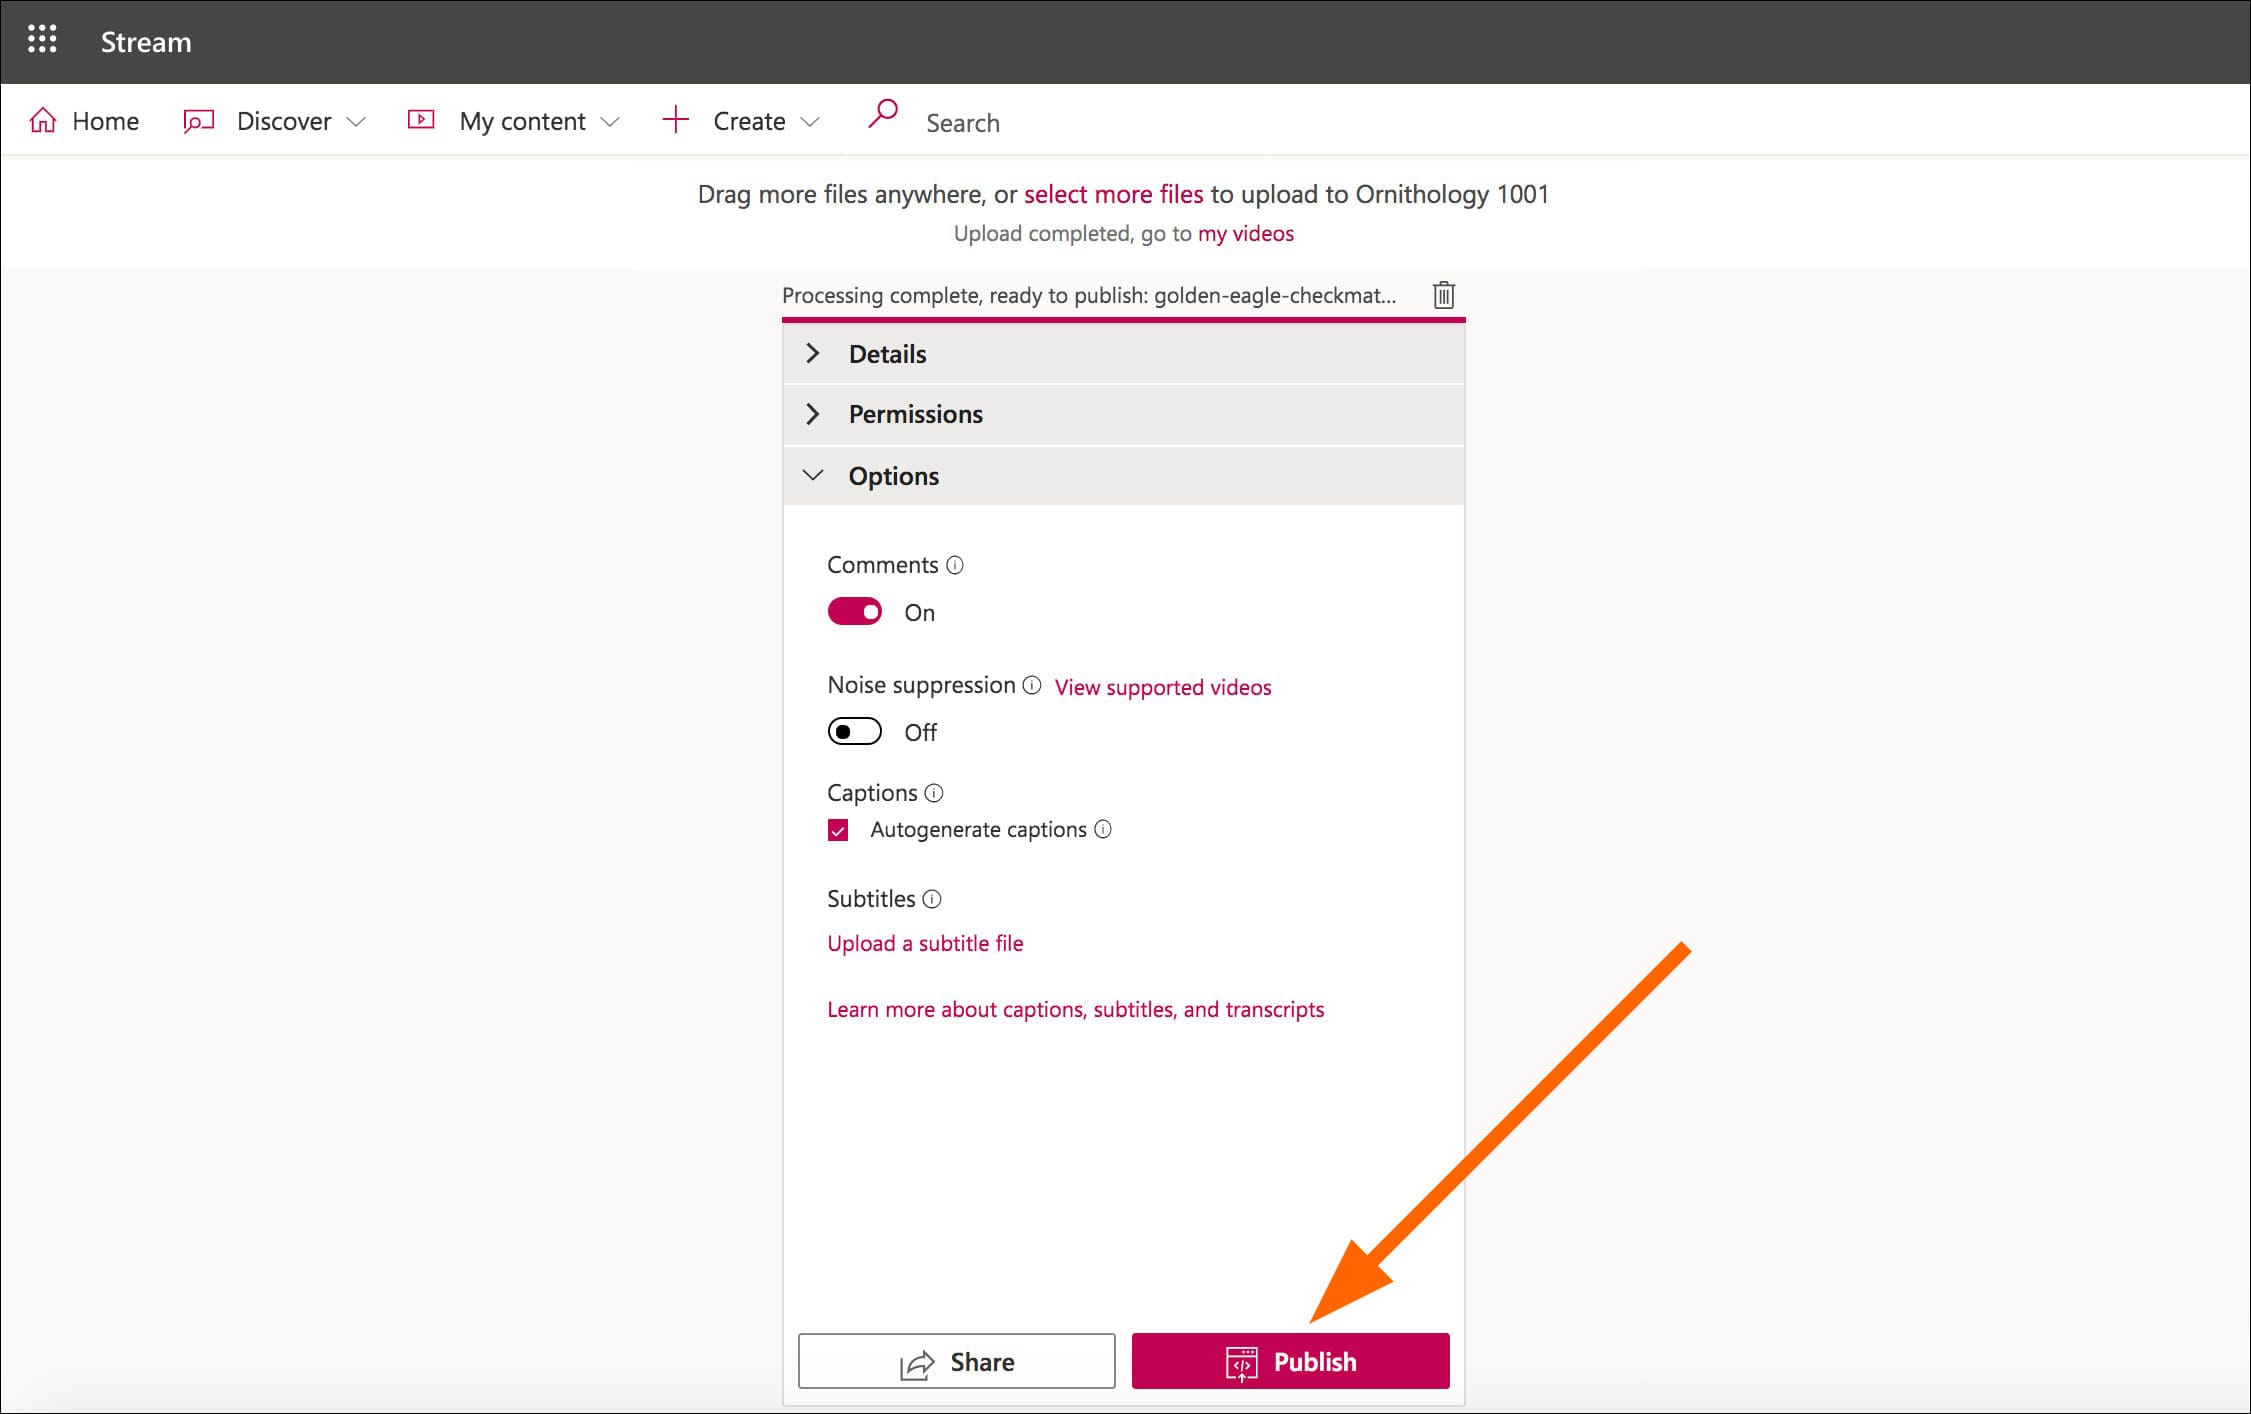
- Click or tap the Options section. Decide if you want to keep comments for the video on or if you prefer comments turned off. Click or tap Publish.
Sharing your Microsoft Stream video
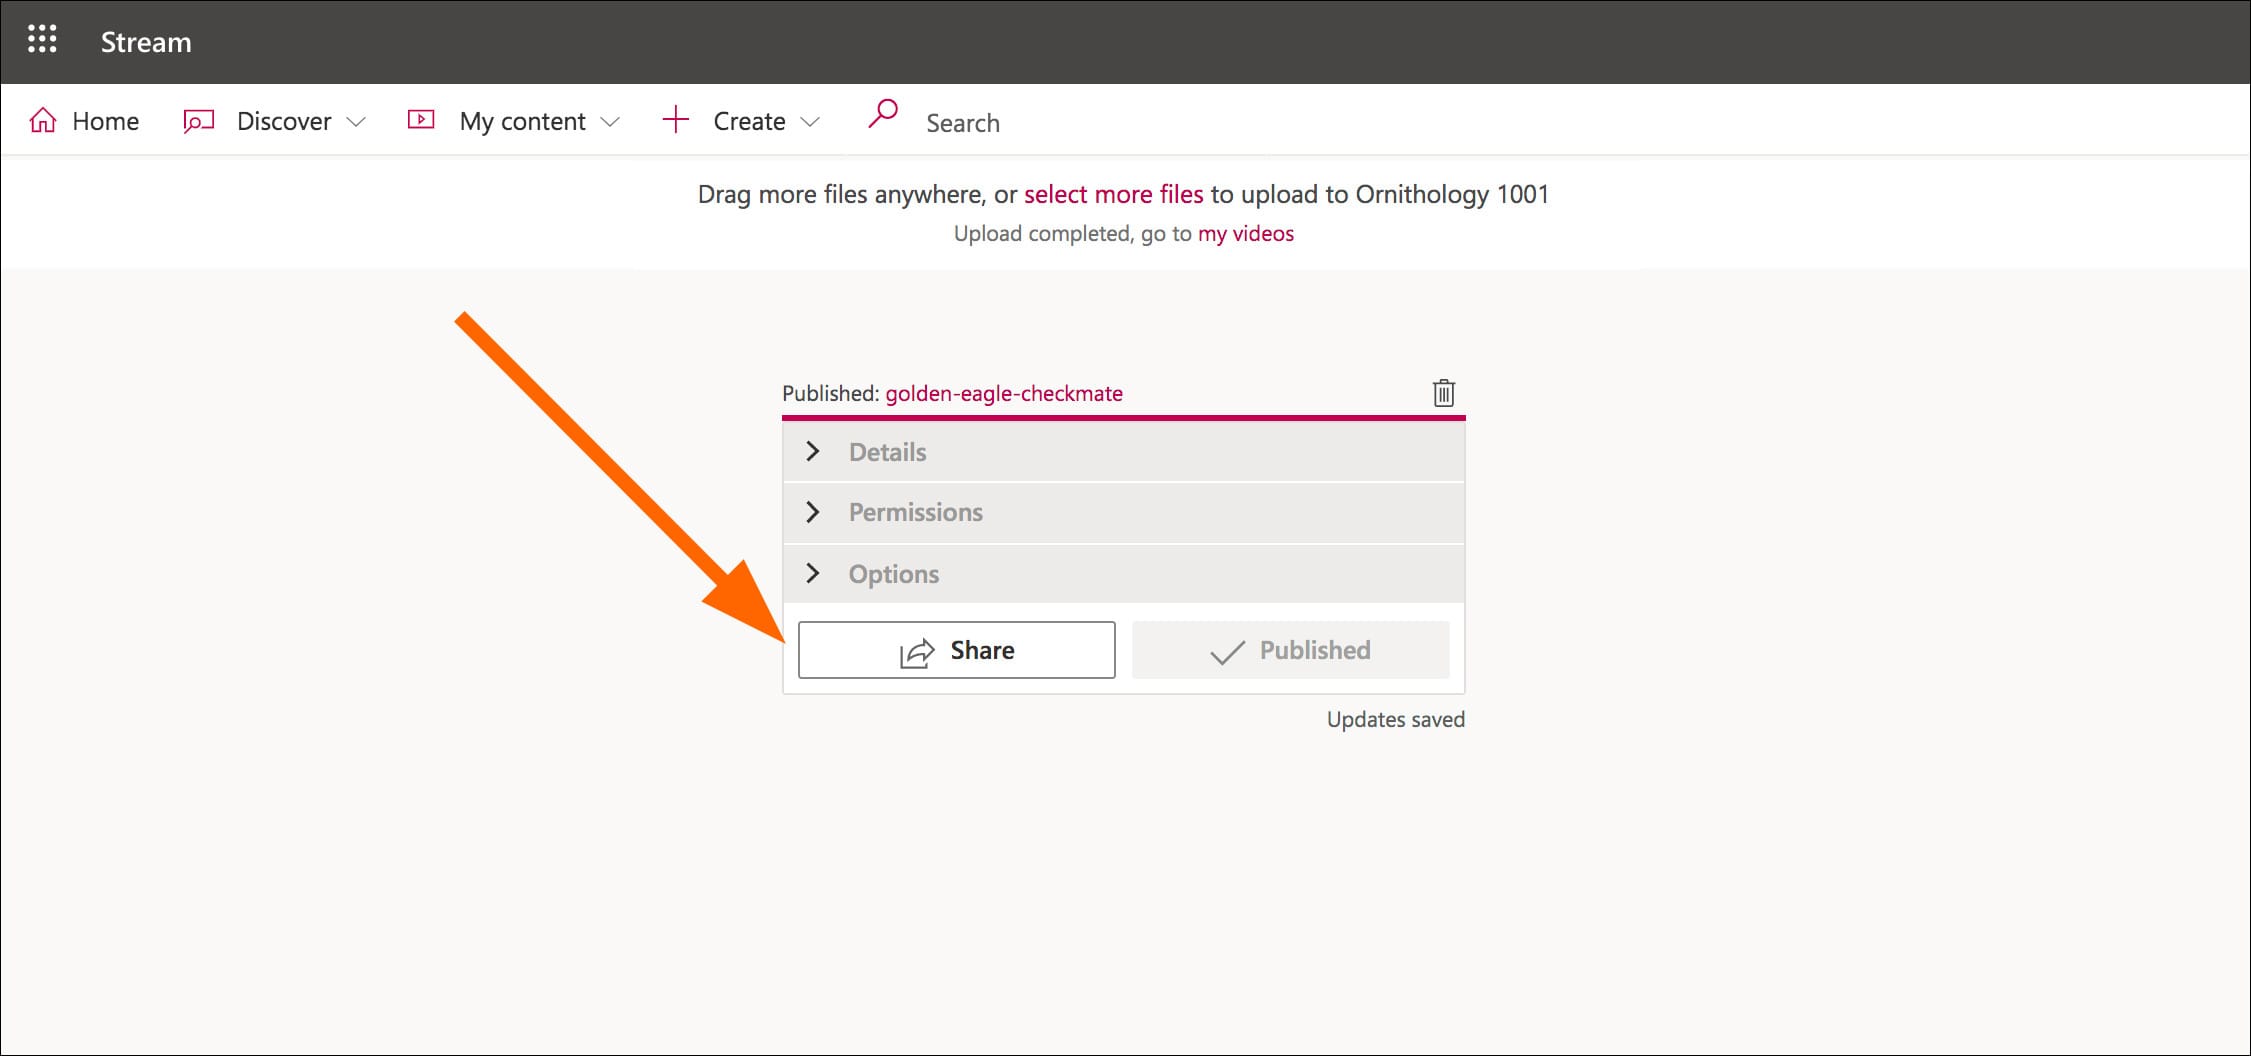
- Your video is published. Microsoft Stream automatically created closed captions. You can edit the captions for accuracy. To share with members of your Teams site, click or tap the Share button.
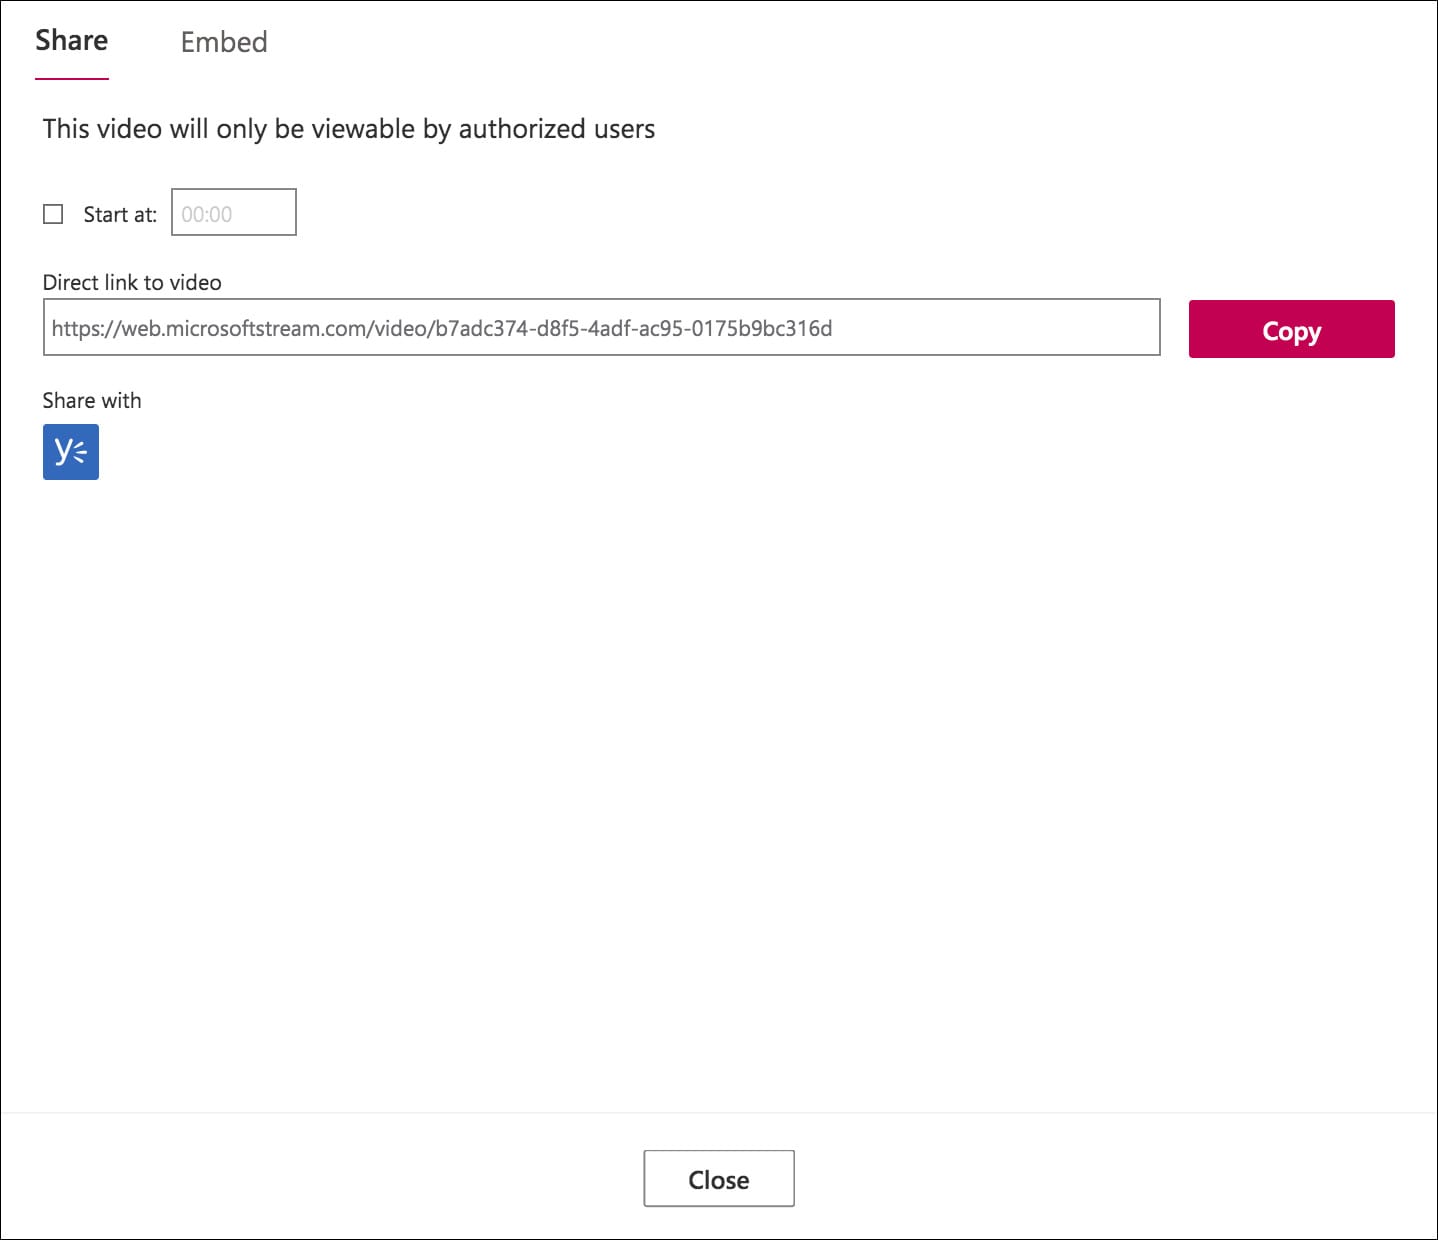
- A sharing screen appears with a web address to share the video with members of your Teams site. Click or tap the Copy button to copy the web address for sharing. Click or tap the Close button.
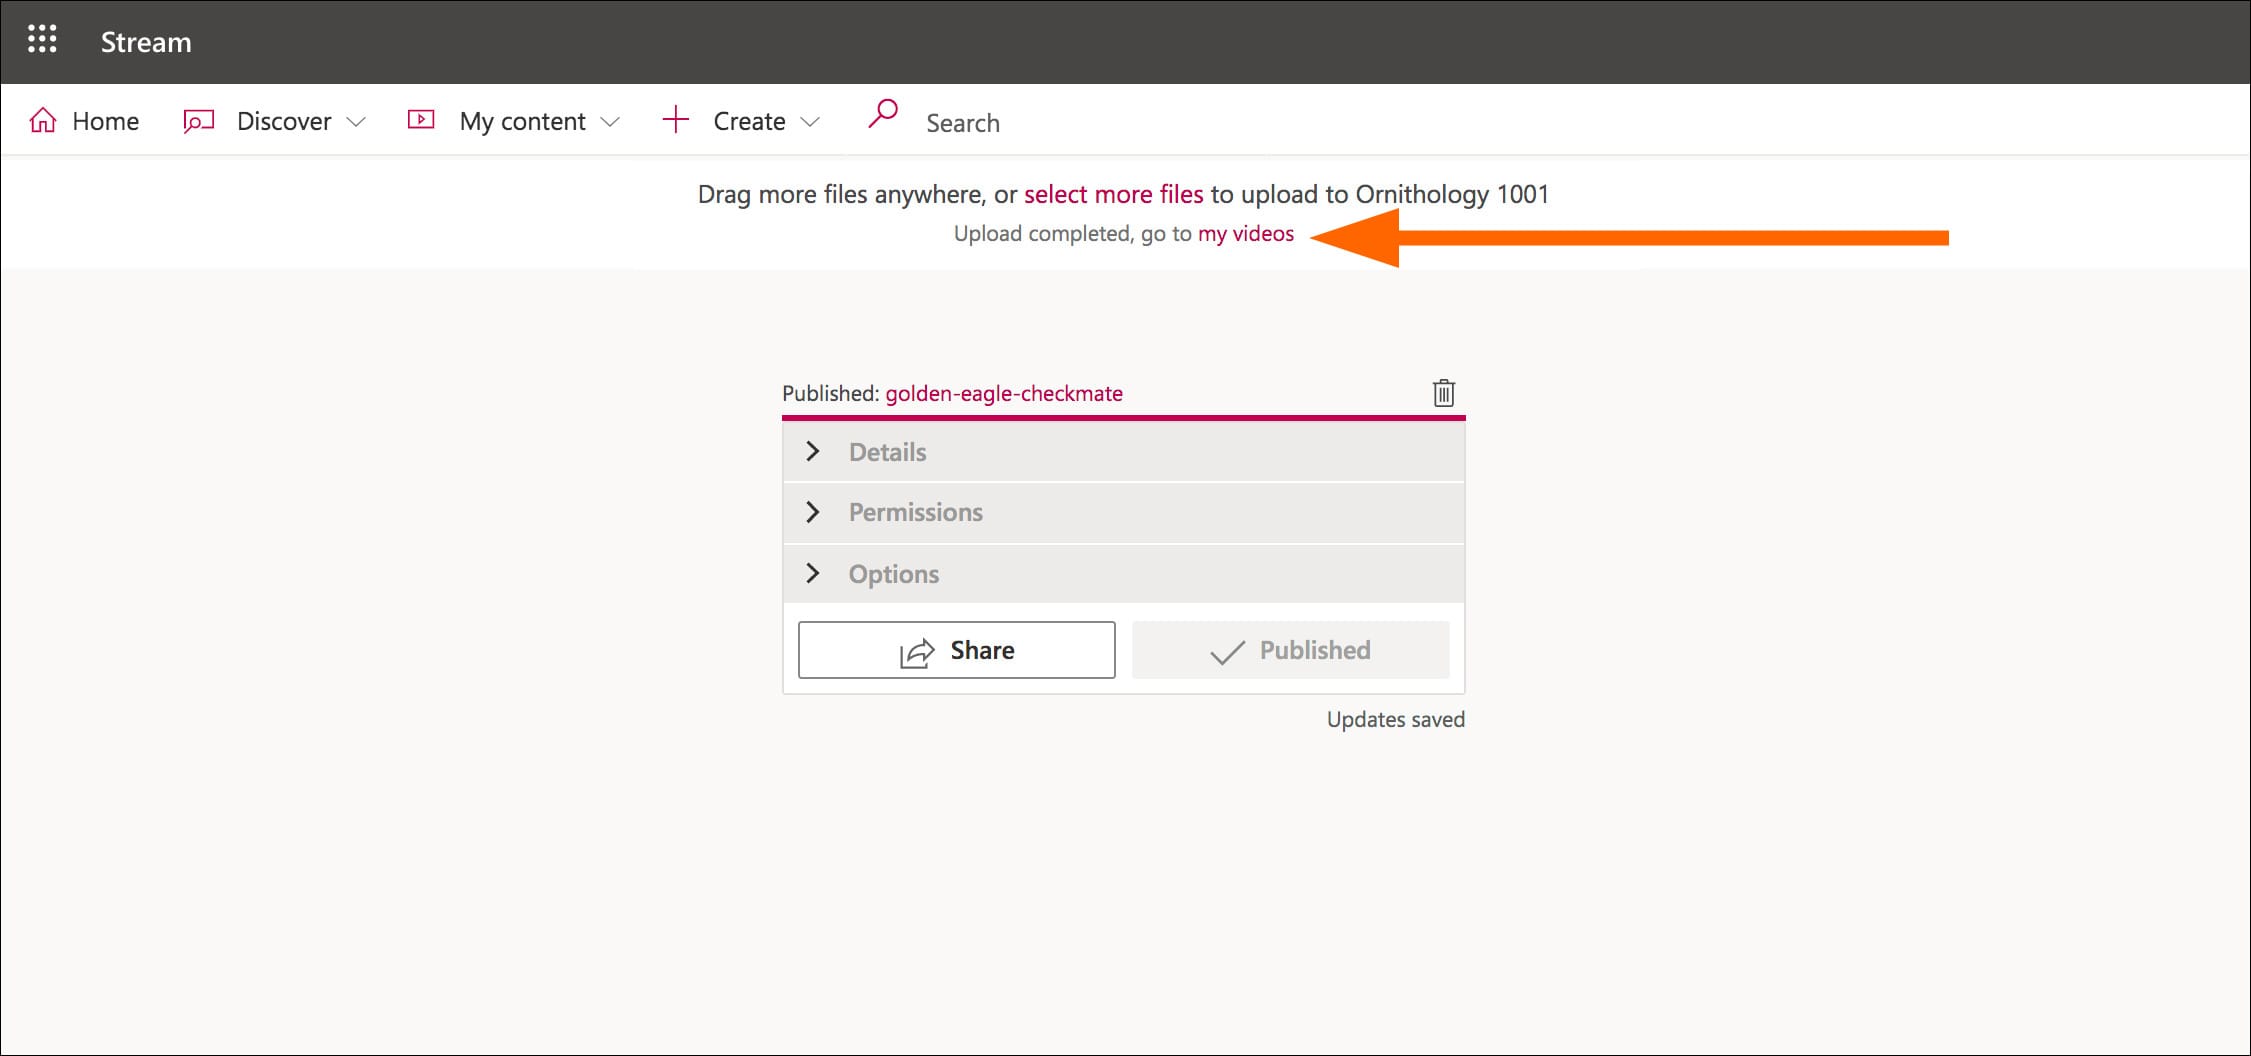
- To return to the videos on your Microsoft Stream page, click or tap the my videos link. Share the link you copied with members of the Teams site or via D2L for class videos.
You have successfully uploaded a video to Microsoft Stream, granting viewing permissions to only members of your Teams site.
Questions?
Please contact the IT Services Help Desk for questions about Microsoft Stream.
Go to About Microsoft Stream Home
Source: https://www.marquette.edu/microsoft-teams/upload-video-to-stream-set-permissions.php
0 Response to "Share a Feed of Links Microsoft Teams"
Post a Comment